
You've probably seen the stunning, full-color prints that DTF transfers can produce on almost any fabric. Maybe you've even tried a few yourself, only to end up with cracked edges, dull colors, or a stiff, plastic-like feel. The truth is, achieving flawless results with dtf isn't about having the most expensive equipment—it's about mastering the details that most tutorials gloss over. In this guide, we'll walk through the entire process, from file preparation to the final press, and share the insider techniques that separate professional-looking prints from amateur attempts. Whether you're just starting out or looking to refine your skills, these actionable steps will help you get consistent, vibrant, and durable prints every time.
Why Flawless DTF Prints Start Before You Print
Most print defects can be traced back to decisions made long before the printer even warms up. Understanding the interplay between design, materials, and environment is key to eliminating guesswork. Let's break down the critical pre-print considerations that set the stage for success.
Design File Preparation: The Invisible Foundation
Your design file is the blueprint for the entire print. A poorly prepared file will produce poor results, no matter how good your equipment is. Start with a high-resolution image (300 DPI at the final print size) and ensure your color mode is set to RGB, as DTF printers use RGB color space. When exporting, save as a PNG with a transparent background to avoid unwanted white boxes. Pay attention to thin lines and small text—they can fill in or become illegible if too fine. A good rule of thumb is to keep line weights above 1 point and text sizes above 8 points for reliable reproduction.
Another common mistake is forgetting to mirror the design. DTF transfers are printed on a film and then pressed face-down onto the garment, so the image must be horizontally flipped. Most RIP software does this automatically, but it's worth double-checking before you hit print. Also, consider the fabric color: if you're printing on a dark garment, your design's white areas will be produced by the white ink layer, so ensure your file has proper transparency and doesn't rely on the garment color showing through unless that's your intention.
Choosing the Right Film and Powder
Not all DTF film is created equal. A quality film has a consistent coating that releases the ink cleanly and withstands the powder application process. Cheap films can cause ink smearing, poor powder adhesion, or difficulty in peeling. Similarly, the powder (adhesive) plays a crucial role in durability and feel. Finer powders (around 80-100 microns) generally produce a softer hand and better detail, while coarser powders may be more forgiving but can add stiffness. It's worth experimenting with a few reputable brands to find the combination that works best for your shop's humidity and temperature conditions.
Storage matters, too. Film should be kept in a cool, dry place, away from direct sunlight. Humidity can cause the film to absorb moisture, leading to curling and printing defects. Powder should be stored in an airtight container to prevent clumping. If you notice your powder is clumping, it's a sign of moisture absorption and it's best to replace it.
The Printing Process: Settings That Make or Break the Print
Once your file and materials are ready, the printer settings become the next critical control point. Small adjustments can have a big impact on ink laydown, drying, and ultimately, the transfer's quality.
Printer Settings and Ink Management
Each DTF printer has its own quirks, but some universal principles apply. First, ensure your ink levels are sufficient and that the print head is clean. A clogged nozzle can cause banding or missing dots that ruin an otherwise perfect print. Run a nozzle check before every print job, especially if the printer has been idle. The white ink layer is particularly prone to settling, so agitate the white ink cartridge or bag daily according to the manufacturer's instructions.
When it comes to print settings, you'll typically adjust ink limits and drying times. Too much ink can cause the film to buckle or the powder to adhere unevenly; too little ink results in dull colors and poor wash durability. Start with the recommended settings from your film and ink supplier, then fine-tune based on your environment. For example, in high-humidity conditions, you might need to increase drying time or reduce ink limits slightly to prevent smudging.
Powder Application: The Step Most People Rush
Applying the adhesive powder is where many beginners stumble. The goal is a uniform, thin layer that covers the wet ink completely but doesn't pile up. Too much powder leads to a stiff, crusty feel and can cause the transfer to fail in the wash; too little powder means poor adhesion and early peeling. The best method is to use a powder shaker or a sieve to dust the powder evenly over the print, then gently shake off the excess. A common technique is to pour a small amount of powder onto the film and tilt it to spread, but this often results in uneven coverage. Invest in a dedicated powder application station or a simple scoop with a fine mesh screen for consistency.
After applying the powder, you need to cure it. This is typically done by placing the film in an oven or under a heat source until the powder melts and forms a smooth, slightly glossy layer. The exact temperature and time depend on your powder and film, but a common range is 100-120°C for 2-3 minutes. Overcuring can make the transfer brittle, while undercuring leaves loose powder that will clog your press. Always follow the manufacturer's recommendations and test with a small batch.
Pressing Techniques for Professional Results
Even with a perfect print, improper pressing can ruin the final outcome. The press settings and technique are just as important as the printing process.
Temperature, Pressure, and Time
DTF transfers require a higher temperature than some other transfer types, typically around 160-170°C (320-340°F). Pressure should be medium to firm—enough to ensure even contact but not so much that the transfer shifts or the fabric compresses excessively. Time is usually 10-15 seconds, but this can vary based on the fabric and transfer size. Always pre-press the garment for a few seconds to remove moisture and wrinkles; this also helps the transfer adhere better.
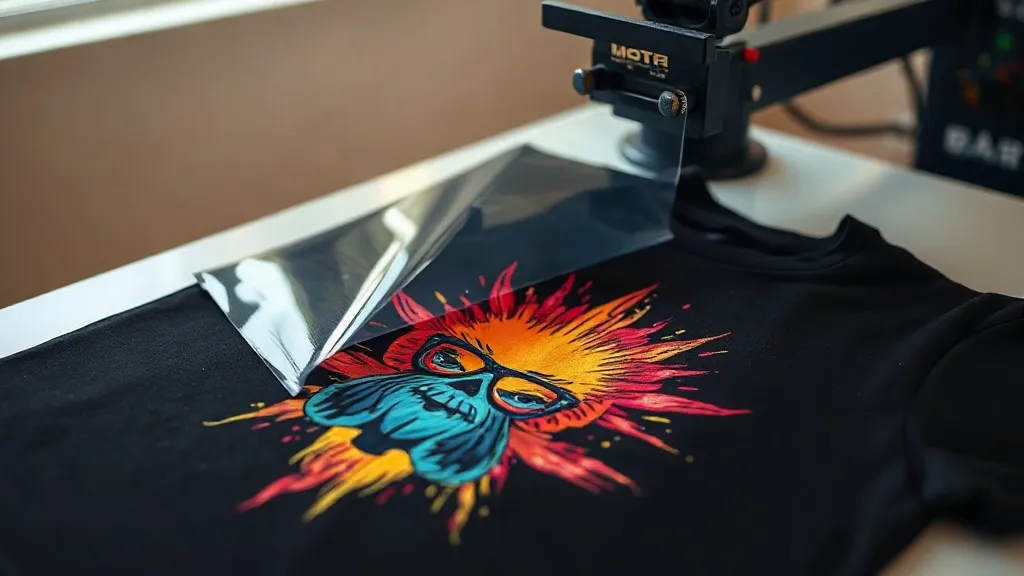
One crucial step that often gets overlooked is the peel. DTF transfers are usually peeled cold or warm, depending on the film type. Cold peel (waiting until the transfer is completely cool) is common for DTF and yields a matte finish. Warm peel can be used for a slightly glossier look but requires precise timing. After peeling, a second press with a protective sheet (like Teflon or parchment paper) for 5-10 seconds ensures the transfer is fully bonded and smooths out any texture.
Handling Different Fabrics
DTF transfers work on a wide range of fabrics, but each has its own considerations. Cotton and cotton blends are the most forgiving, while polyester requires lower temperatures to avoid dye migration. For stretchy fabrics like spandex blends, you may need to adjust pressure and use a stretchable transfer film. Always test on a scrap piece of the same fabric before pressing the final garment. Also, consider the fabric's texture: a rough canvas will require more pressure to push the transfer into the weave, while a smooth performance fabric needs less.
Troubleshooting Common DTF Problems
Even with careful preparation, issues can arise. Here's how to diagnose and fix the most frequent problems.
- Cracking or peeling after washing: Usually caused by insufficient powder, undercuring, or too low press temperature. Ensure powder is evenly applied and cured properly, and verify press settings.
- Dull or faded colors: Often due to too little ink or incorrect color profiles. Check ink levels and run a test print to calibrate.
- Stiff or plastic-like feel: This results from too much powder or excessive ink. Reduce powder application and adjust ink limits.
- Transfer not adhering: Could be due to insufficient pressure, wrong temperature, or pressing over seams. Use a pressing pillow for seams and ensure even pressure.
- White ink not opaque: May need to increase white ink layers or ensure the white ink is properly agitated before printing.
For those looking to purchase quality supplies, you can find a range of dtf transfers near me options online, but always source from reputable suppliers who provide consistent products and support.
Frequently Asked Questions
How do I prevent the transfer from feeling stiff on the garment?
The key is to use a fine powder (80-100 microns) and apply it sparingly. Also, avoid over-inking the design; a thinner ink layer with proper white ink coverage will feel softer. Additionally, some films are designed for a softer hand, so experiment with different brands.
Can I use DTF transfers on 100% polyester?
Yes, but you need to be careful with temperature to avoid dye migration. Use a lower press temperature (around 150°C) and a shorter press time. Also, pre-press the garment to remove moisture and consider using a barrier sheet to protect the transfer from dye sublimation.
What's the best way to store unused DTF transfers?
Store them in a cool, dry place, away from direct sunlight. Keep them flat to prevent curling. If you're in a humid environment, place a desiccant packet in the storage container. Properly stored transfers can last for several months.
Why is my white ink not opaque enough?
This can happen if the white ink is not properly agitated (settling occurs), if the print head is partially clogged, or if the white ink layer is too thin. Agitate the white ink daily, run a nozzle check, and increase the number of white ink layers in your RIP settings.
How do I choose the right powder for my DTF printer?
Consider the powder's mesh size: finer powders (80-100 microns) give a softer feel and better detail, while coarser powders (100-200 microns) are more forgiving and suitable for bold designs. Also, ensure the powder is compatible with your ink and film. Test small batches to find the best match for your workflow.